Automating our home video imports
My mom called me up last week and told me they were going to digitize all our old home videos. Great idea, I told her. Tapes degrade over time and we have a much more robust way to backup our digital copies versus physical ones. Plus it was certain to deliver a nice dose of nostalgia before the holidays.
"How much will it cost?" (me thinking somewhere in the ballpark of $750)
"Oh they're having a promo right now - they can do it for around $4000"
$4k! In this economy?1 No way.
We've been down this road before
I remember spending a few weekends in high school going through our old tapes, connecting them to my white plastic Macbook and importing them via firewire. I put them on Vimeo and shared the login keys with some extended family that wanted to watch. Pretty janky but they were happy for any quality of memories that were otherwise already forgotten.
But the project never really felt done. Questions lingered in the years since:
- Did I really archive at the highest quality possible, to the point that I would feel comfortable throwing out the physical tapes.2 Ideally we should do the closest thing to copying raw bits as possible.
- Did I really import everything? Is there a way to sanity check that? Minimally we should have some robust tagging where if we find a new tape in the future we can easily check if it's already been archived.
- The outputs have always been a single long video file. Is it possible to auto-chunk and organize them into the dates where they were actually recorded? Some of these tapes stretched years, which makes random access much more difficult.
Formats beautiful formats
We have a host of content from when I was growing up but the bulk is in four main formats: Data CDs+DVDs3, Video DVDs, MiniDV tapes, and Hi8 tapes. There's a longtail of Blueray disks, VHS tapes, and audio tapes. I'm less worried about the latter because the volume is low enough where it becomes feasible to send them to a third party.
Reading our discs is as straightforward as it's always been.4 All of the old external CD drives still work with modern operating systems so our only decision is parallelism. We'll have to buy the same number of external DVD readers as we want to import at the same time. I opted for just one for now.
MiniDV and Hi8 are both cassette tapes, so I was under the initial impression that they were technically the same thing as well5. But the image writing techniques couldn't be more different. MiniDV is a full digital data stream that is written by the tape head as magnetized bites. Hi8 is older and relied on writing analog electrical waveforms to represent the brightness and color of the image. Because digital bytes relied on an encoding protocol it's also possible to apply error correcting codes to the stream; Hi8 tapes have no such luxury. It's the effective difference of writing a record versus writing a CD - your ability to play records is more contingent on the hardware sensitivity of your playback machine but even the cheapest CD reader is playing the bytes exactly as they were written in the first place.
The two ways of getting video off these tapes are composite capture and dvlink.
Composite capture relies on the same protocol that lets you connect your camcorder to your TV. They look like USB dongles that connect to the red, yellow, and white analog connectors. Internally they have a video converter that combines those RYW streams into one cohesive picture. If you want to increase the captured quality you can also hook S-Video. It works by separating the luminance (Y) and chrominance (C) signals into two distinct lines instead of combining them into one composite signal, which reduces color bleeding and cross-talk between the brightness and color information.6 By the time the bytes have reached your computer they're already encoded in MPEG-2 or H.264, depending on what your specific capture device supports; the analog-to-digital conversion and compression happens entirely within the dongle itself. Composite capture is the most universal since it works with basically any camcorder and you only need to buy one USB adapter, which itself is compatible with a pretty wide amount of software and is almost guaranteed to be future compatible.
dvlink on the other hand is like microFirewire. It was an Apple originated protocol that really caught on within the professional studio ecosystem, since it allowed for higher transfer speeds than other import pipelines. dvlink works by literally reading the byte stream from the tape head and transferring that to your computer. Your camcorder needs to know the dvlink protocol, and your computer needs to know Firewire, to be able to re-encode those bytes into a video container format. But assuming you have the requisite hardware, this is the most lossless way of getting the data from the tape to your software.
Lossless quality
I know this is going to take a couple of weeks. That's a hit I'm willing to take. But I would really rather not do that a second time. So my plan is to archive these tapes as lossless and as close to their original format as possible.
You will literally get the bytes off the tape in the miniDV case. Lossless indeed. In the Hi8 case you'll be getting a dv feed converted from the analog input. Because camcorder tapeheads are surprisingly high quality7 this is one of the more accurate analog to dv conversions you can make. This is what it's actually doing internally:
- Reading the analog FM signal from tape (Y/C + audio)
- Digitizing it internally using an analog-to-digital converter (ADC)
- Encoding it in real-time into the DV25 codec (25 Mb/s for MiniDV)
- Streaming that compressed digital data over Firewire
If you have a Hi8 camera and are following along, make sure you set it explicitly to output DV Out. This was buried in my Sony under Menu > Av/DV Out which was disabled by default. Without it I could see the video stream but couldn't control its actions from my Mac.
My goal formats for each input:
- CD/DVDs -> mountable iso (1:1 byte copy)
- Tapes -> byte stream from firewire (.dv format)
After the files are imported in their raw formats, I can kick off a handbreak or ffmpeg job to convert them to near archival quality in mkv. This gives me a much smaller file size that's indexable by my media server. But I still plan to keep the originals on my NAS to always be able to re-convert the files if a better transcoding technique comes our way. Eyeballing the number of tapes in the pile should come out to ~1TB of storage overhead for the raw files.
dvrescue
dvrescue is a utility designed to record dv byte streams from the camera exactly as they are read from the tape. As you might assume from the name it also has support for attempting to recover corrupted frames from the camcorder.8 It also supports writing commands to the dv protocol, which allows you to remotely control your camcorder from your computer. I always found it pretty magical when iMovie could control a video camera that you connected; this was how they made it happen.
For the most part the utility works great. There were a few issues that I discovered when doing some initial testing.
-
Issuing a
playcommand from the server would play the video but no audio. Behind the scenes, dvrescue was sending a seek speed=1.0 to the camera. So the tape was rolling at the normal speed and we could see the frames, but this was effectively like seeking 2x during a fastforward where the camcorder reasonably doesn't want to render chipmunk audio. I switched this by updatingVCR_OPE_PLAY_FORWARDfrom 0x38 → 0x75, which is the actual dvlink command for playing the video. With this it captures both video and audio with one command. -
Write periodically to disk. By default it buffers all of the dv contents in a user space tmp file, which is okay for most normal capture situations. But in my case I also wanted to pipe the latest frame captured in the dv into a utility to monitor the ripping jobs. So I added a
--flushcommand that lets you specify the megabyte interval that should be periodically flushed. -
Sometimes the
--capturecommand fails early, within a minute of the recording. This leaves the camcorder playing its footage but the dv file would only have a few mb written to disk. I solved this by having a control loop monitor the capture for completion. Any time it's done, we analyze the duration of the dv file - if less than 5mins, it automatically rewinds to the beginning and starts to capture again.
Fixes for (1) and (2) are in my fork. (3) is in my control utility.
The Pipeline
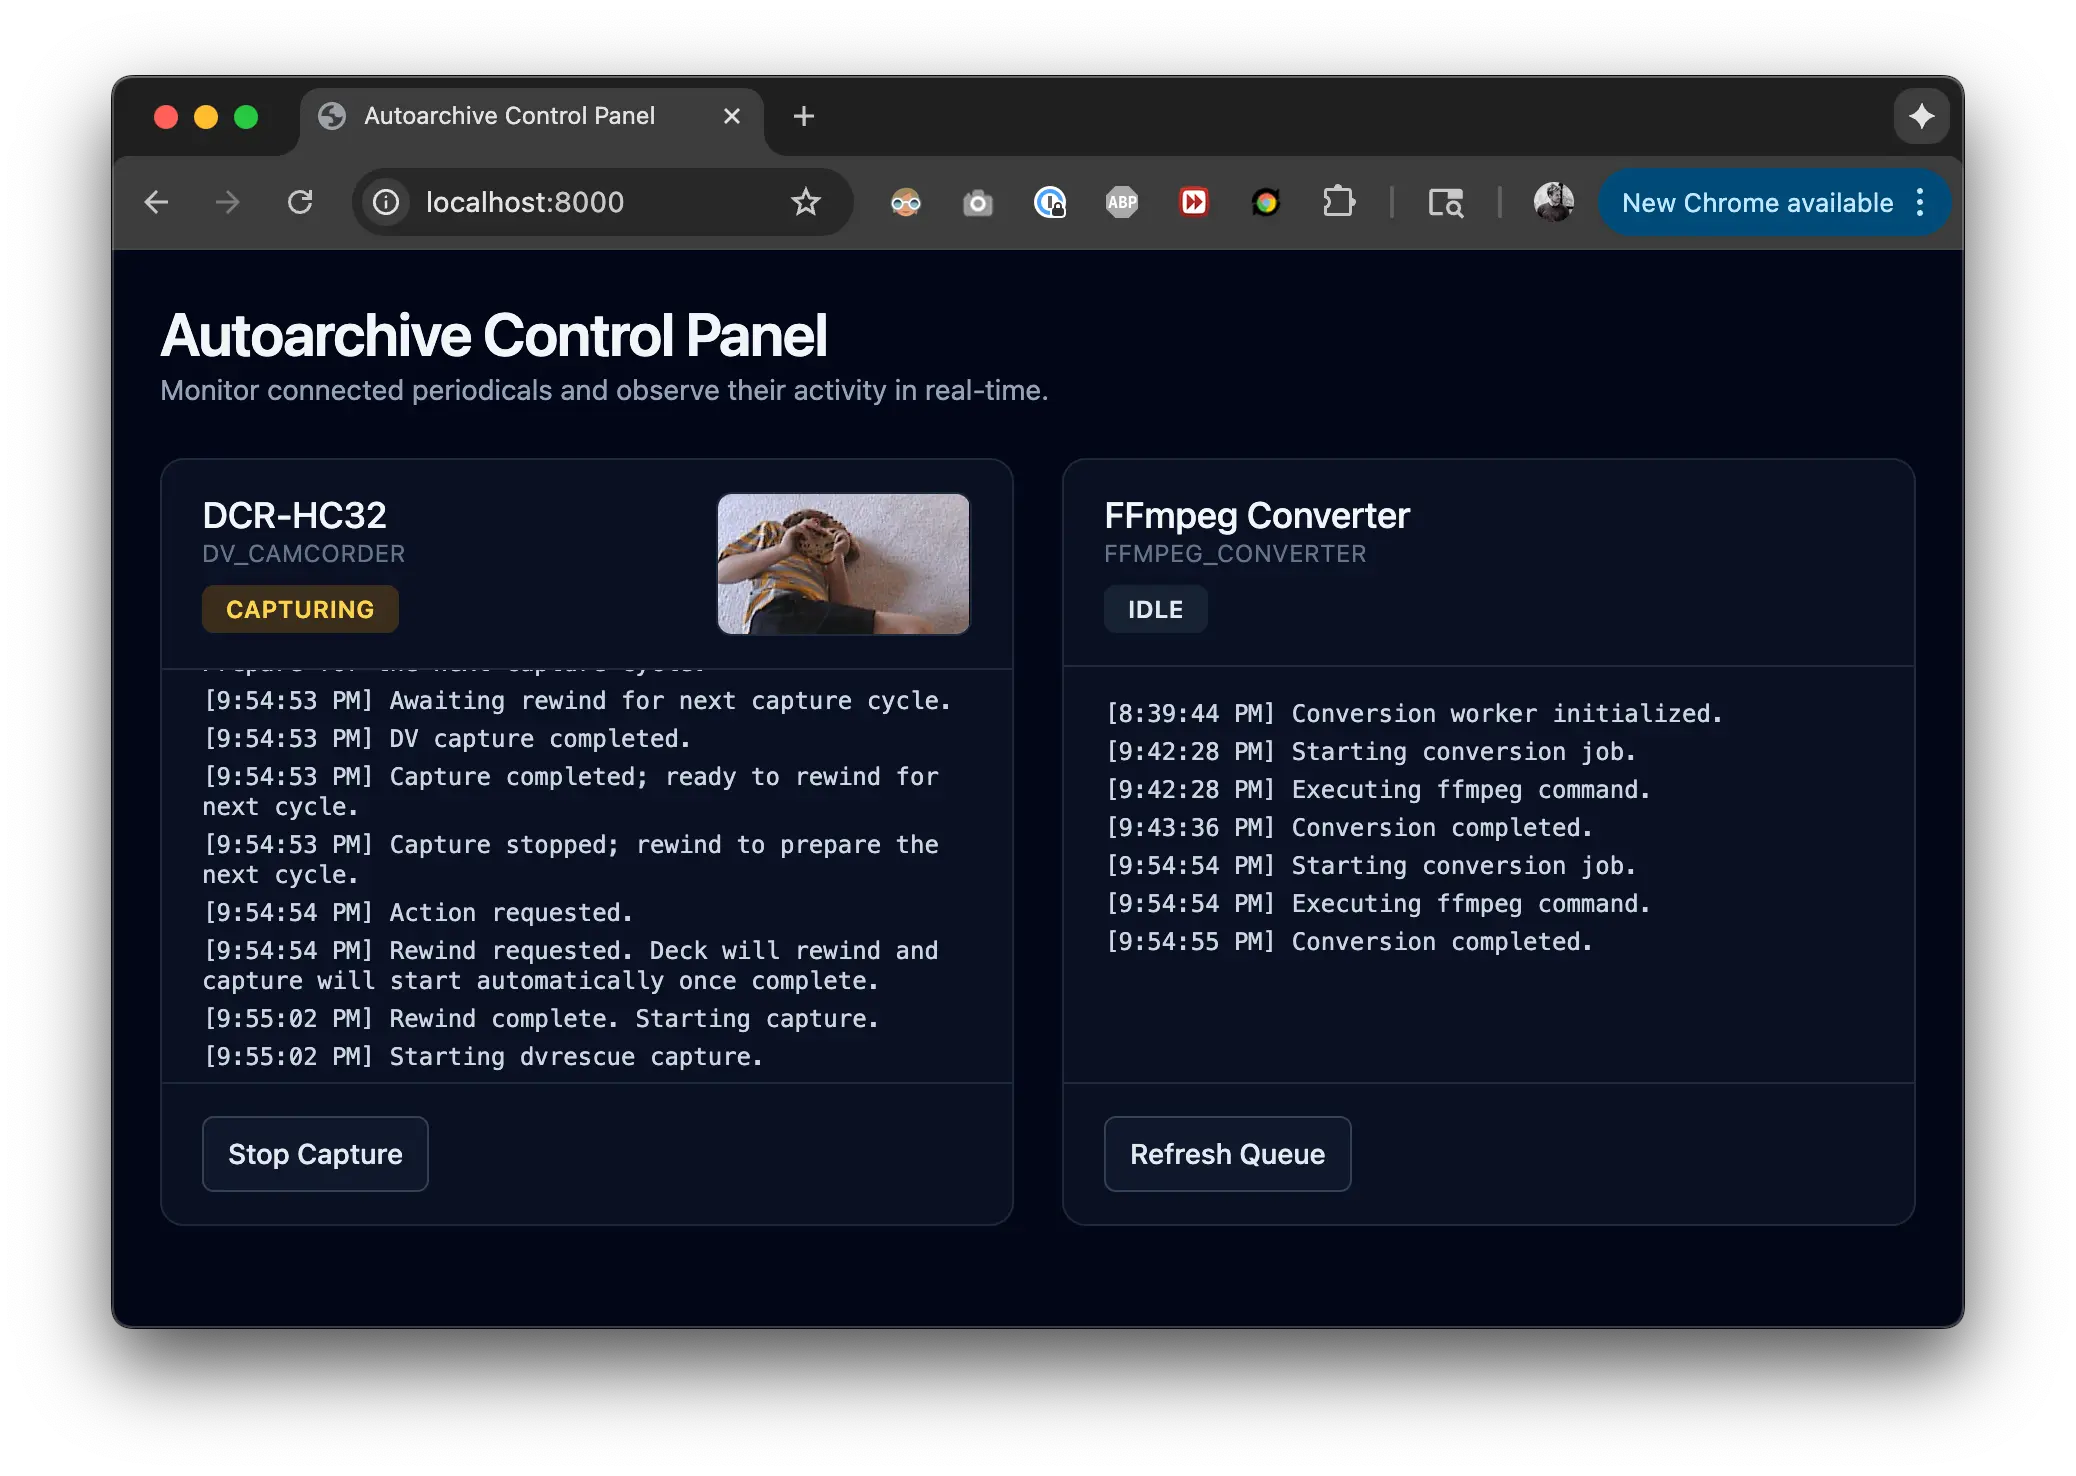
There were too many of these tapes to not have some meaningful automation. I iteratively built up a few utilities with the basic conceit that we need to physically change over the tapes when done. The rest of our pipeline should be fully handled by a supervisor. This program handles consistent filesystem structure, error detection, transcoding, clipping, labeling, and notification upon the completion of each tape.
I originally built a small CLI to help me with some of the importing, but it ended up being more convenient to build the frontend as a webapp instead of a TUI. TUIs still don't have support for image capture or particularly good OS-level notification support; Chrome has both.
$ uv run autoarchive-web-serve --destination /Volumes/FamilyPhotos/Videos

Uvicorn running on http://127.0.0.1:8000 (Press CTRL+C to quit)
The bulk of our logic is handed via asyncio commands sent to the shell to read from OS level utilities. Depending on the output of these commands, we either parse the stdout for regex matches or parse the outputs directly as json.9 Some of these commands:
Device Discovery:
system_profiler SPFireWireDataType -json- Poll for connected camcordersdiskutil list -plist- Enumerate optical drivesdiskutil info -plist <device>- Get detailed disk metadata
Tape Control:
dvrescue device://<guid> --status- Check if tape is presentdvrescue device://<guid> --cmd rew --foreground- Rewind to beginningdvrescue device://<guid> --capture --merge <output.dv>- Capture tape to file
Optical Media:
drutil status- Query optical drive statediskutil mountDisk <device>- Mount all partitionshdiutil makehybrid -o <output> <source> -iso -udf- Create ISO imagediskutil eject <device>- Eject disc when complete
Transcoding:
ffprobe -v error -show_entries format=duration <file>- Get video durationffmpeg -i <input.dv> -c:v h264_videotoolbox -crf 16 <output.mkv>- Convert DV to archival qualityHandBrakeCLI --preset "Production Max" --input <iso> --output <mkv>- Rip DVD content
Our frontend is a series of Jinja templates, which I dislike writing by hand but coding LLMs are shockingly proficient in. All the actual logic is in the backend layer - we just issue commands and stream logs via POST requests and SSE.
We scan for all the periodicals connected to the system using system_profiler. This lets us grab all connected DVD readers and camcorders. We lay out each one in a separate log streamer. We include a singleton media converter that owns the handbrake/ffmpeg conversion depending on the type of input file. isos are passed to handbrake and dvs can be piped directly to ffmpeg.
A simple sqlite database in the destination volume on our NAS acts as our job broker. When we start importing a new media file, we write a new row. When the object changes state into a CAPTURE_DONE we poll it by the ffmpeg worker to do the encoding.
We poll every second for updated status from the periodicals, so once a tape is inserted we update the UI to show a Capture button. Clicking the button will rewind the tape and start capturing once it's completed. When the capturing is completed (1:1 with the length of the tape) it will display a system popover reminding me to change over the tape.

As I pop out the tapes, I get another action button to capture an image of the cassette. Most of these have some kind of hand label of the dates or events that were captured. The UI pops up a simple javascript capture box that lets me connect to my iPhone via Continuity Camera.10
I still capture these images for physical discs. But with isos we have a bit more metadata within the actual bytes than we have as part of tapes. Once capture is complete also do a full scan of the files that are contained within the disc to try and figure out when it was burned in the first place, by looking at the average created date of the files.
With this basic pipeline I got 3x parallelism of importing DVDs, Hi8, and MiniDV tapes at the same time. I entertained some brief fantasies of buying up 5 different camcorders and chugging through this workload in a few days but I held off since working camcorders are about $200 a pop on eBay. We're trying to keep costs low here, people.
Video Quality
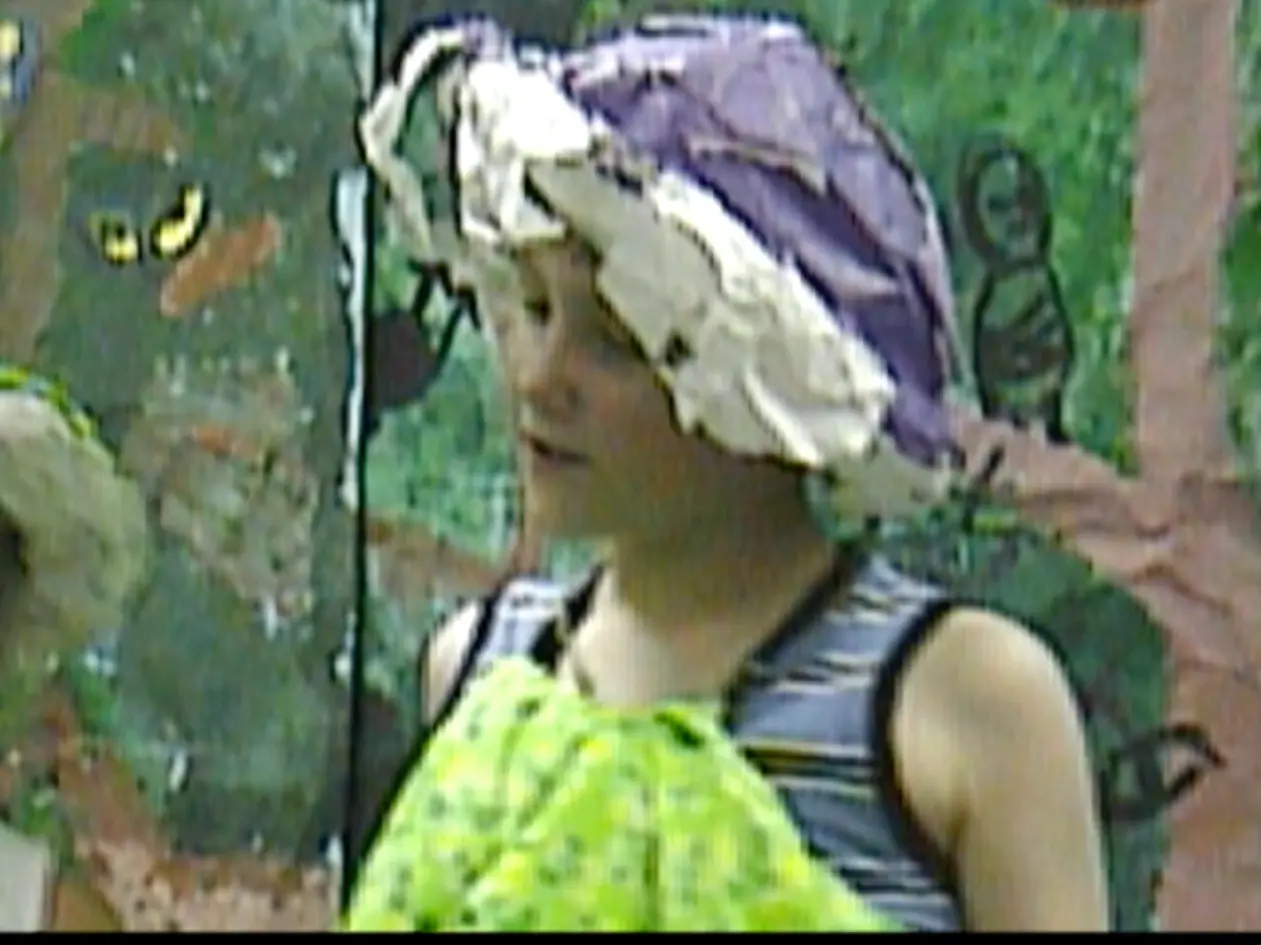
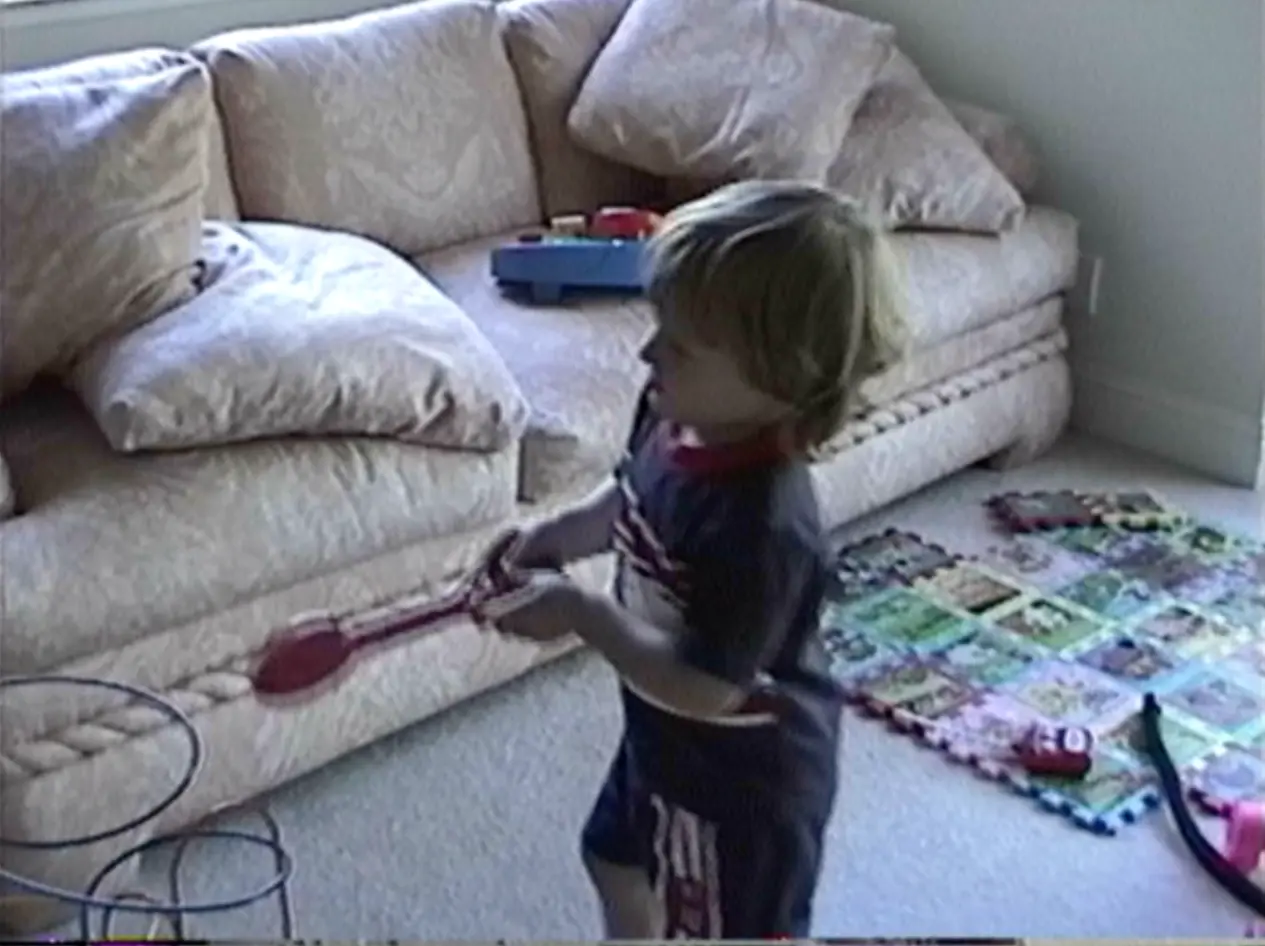
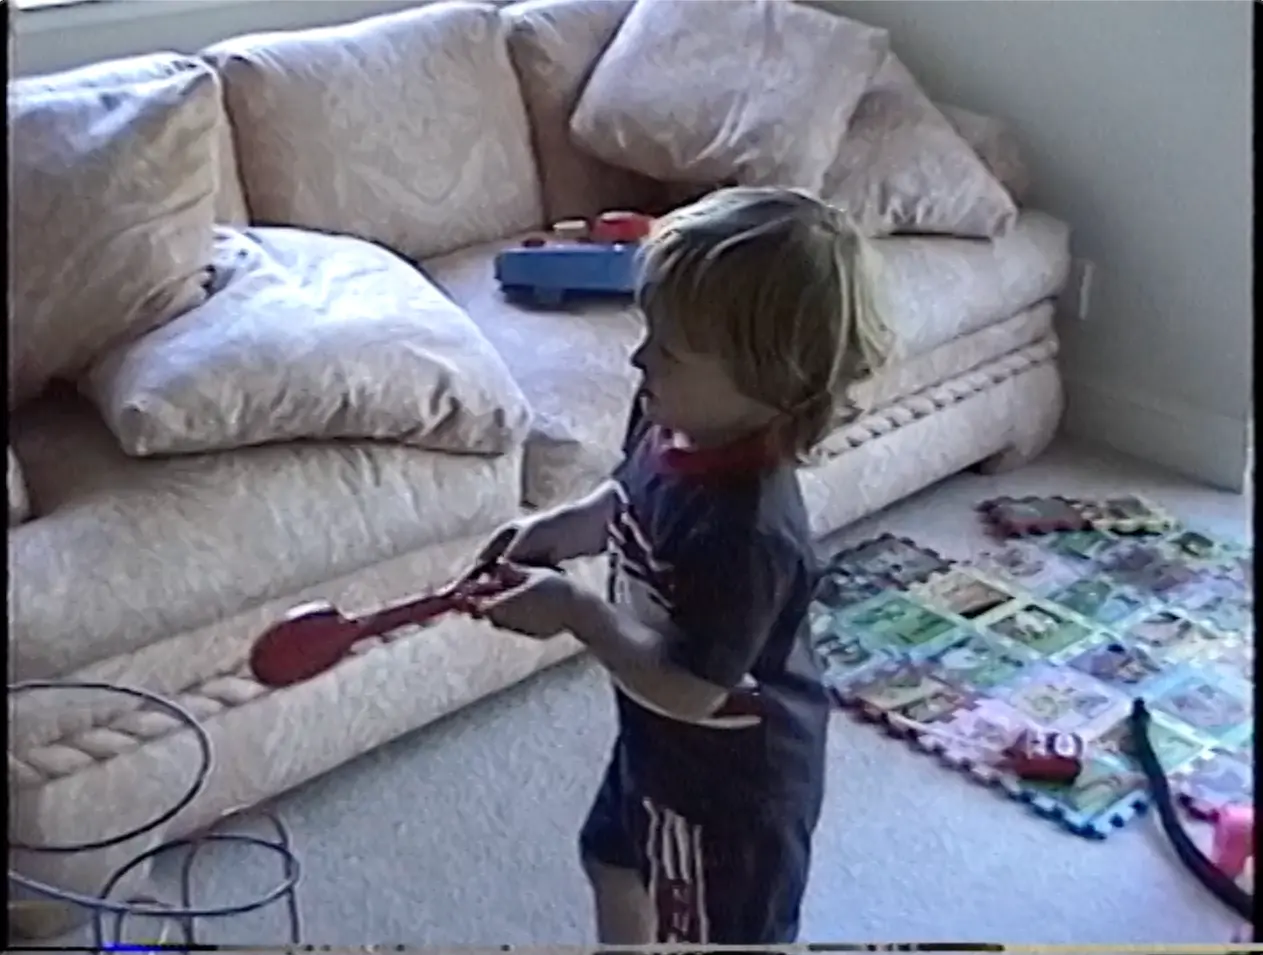
The quality of my converted Hi8 tapes looked pretty consistent, whether from 95 or from 2000. The miniDV tapes had a much higher variance of their quality: some looked like a pixelated blob and others were a lot smoother. You can take a look at a few of these examples - each image is from a different tape.

Hi8 Tape Quality

MiniDV Tape Quality
As far as I can tell no digital zoom has been applied specifically to the tapes that look bad. All files (both Hi8 and MiniDV) are also the same video size: 720x480 with yuv411p.
# minidv
[dv @ 0x159804080] Estimating duration from bitrate, this may be inaccurate
Input #0, dv, from '/Volumes/FamilyPhotos/Videos/dv/dcr-hc32-20251104-204000/capture.dv':
  Duration: 00:20:30.80, start: 0.000000, bitrate: 28771 kb/s
  Stream #0:0: Video: dvvideo, yuv411p, 720x480 [SAR 8:9 DAR 4:3], 28771 kb/s, 60k fps, 29.97 tbr, 60k tbn
  Stream #0:1: Audio: pcm_s16le, 32000 Hz, stereo, s16, 1024 kb/s
  Stream #0:2: Audio: pcm_s16le, 32000 Hz, stereo, s16, 1024 kb/s
I can't offer an explanation - other than at some point we had a miniDV recorder whose digital optics conversion was really bad. At record time it just wrote pixelated data to the tape and when we read it back, it stays pixelated. That's simply all the data we have stored on tape. miniDV makes your original source camera a whole lot more important.
That brings us to interlacing. All dvlink protocol transfers are assumed to be interlaced, so it's technically streaming 480i instead of 480p footage to your computer. Interlacing came from when cameras didn't have tape size to write every frame during every timestep11. So at each 1/30fps, the camera only writes half of the given horizontal rows to the tape (240 in the case of 480 vertical rows). We just smooth it with the next frame's worth of the other 240 rows.
This results in the occasional striping you see on old tapes. But generally speaking it's not very visible to the human eye.
Interlaced, raw .dv
It's the most apparent during movement. Which intuitively makes sense, because that's when there will be the biggest delta in rendering from frame to frame. To smooth it out you can use a deinterlace algorithm.
Deinterlaced with yadif (Yet Another DeInterlacing Filter)
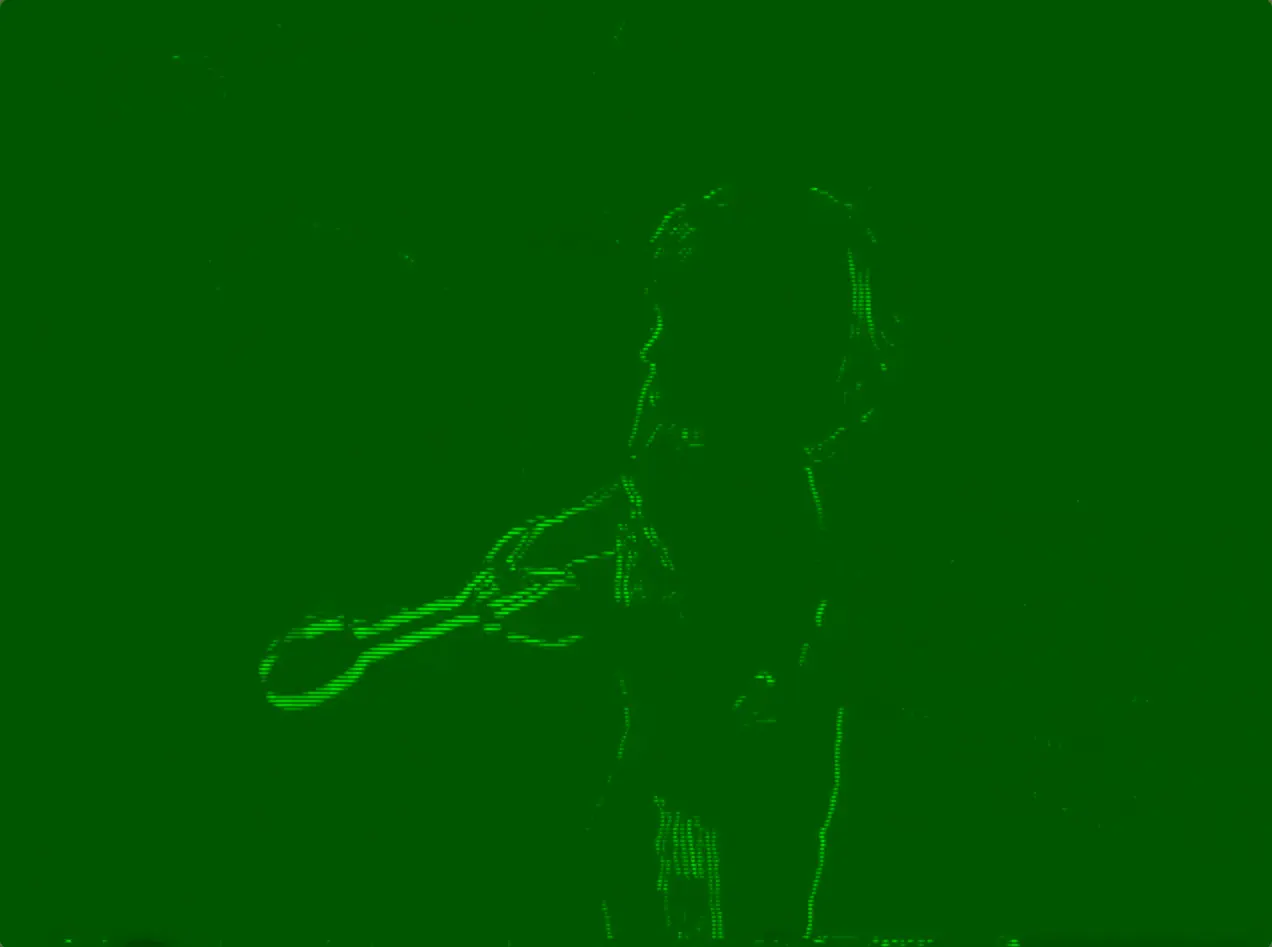
The full pixel difference between the two approaches makes it clear this happens mostly at the edges where there is maximal movement:
Clip Extraction
Some miniDV tapes have the original metadata embedded at record time so we can chunk them with full accuracy. These live in the VAUX subcode area on the tape, which stores arbitrary non-frame metadata. This is not part of the compatibility standard: cameras can choose to write clip boundaries or not. About 30% of my tapes had them and 70% did not.
With Hi8 you don't even have a shot. Since we have a combination of tapes that have the metadata and don't, we're going to have to figure out a way to brute force it. Given a single two hour long video file, we need an algorithm that will extract the different clips contained within it. There a bunch of different options here all under the general research area of shot boundary detection.
- PySceneDetect
- TransNetV2
- Using a video LLM to output timebreaks; Gemini 2.5 Pro is the most capable in this area
I decided to put them to the test. I took one of my converted videos and downsampled the 22GB dv file into a more reasonable 750MB file lasting 1:45:00. I scrubbed through the video and hand labeled when there was a cut and the camera moved to a different angle or scene.12
This task is not easy! Even for a person. These are home videos, not cinematic masterpieces. There is a lot of aggressive zooming, some clips are only a few seconds in duration, exposure is inconsistent, etc. Generally speaking I would prefer a chunking algorithm to be overly relaxed with cropping: it's better to combine multiple similar looking clips in one video file than incorrectly cut a single clip into multiple different ones.
This one ground truth annotation had 131 clips spanning from a few seconds to a few minutes. I implemented a greedy evaluator to align the predictions with our ideal scene cuts:
- Find the closest ground truth scene cut
- If the distance is ≤ tolerance (1.0s default), it's a match
- Each ground truth can only match once (greedy)
- Track the temporal error (how far off the prediction was)
Here's how the different approaches broke down:
| Extractor | Precision | Recall | F1 Score | Detected | TP | FP | FN | Mean Error (s) |
|---|---|---|---|---|---|---|---|---|
| transnetv2 | 0.733 | 0.811 | 0.770 | 146 | 107 | 39 | 25 | 0.311 |
| pyscenedetect1 | 0.159 | 0.939 | 0.273 | 778 | 124 | 654 | 8 | 0.359 |
| pyscenedetect2 | 0.397 | 0.727 | 0.513 | 242 | 96 | 146 | 36 | 0.307 |
| gemini (flash) | 0.091 | 0.008 | 0.014 | 11 | 1 | 10 | 131 | 0.120 |
pyscenedetect1 uses ContentDetector with a medium threshold of 27.0. pyscenedetect2 uses AdaptiveDetector with the default threshold 3.0.
I tried to run this inference pipeline with Gemini 2.5 Pro, since I've found it far more accurate in the past - especially for video queries. Unfortunately my videos kept getting flagged by the PROHIBITED_CONTENT automatic filter. Google describes this error for content "flagged for containing the prohibited contents, usually CSAM." But even recognizing this was a tape of me as a baby13, I couldn't find what might have been misinterpreted as objectionable. I was minimally in diapers in every scene if not a proper fit when I was out on the town. My guess is they're optimizing a bit more for recall here than precision.
transnetv2 was remarkably performant, even when just running on my M1 Max. I was a bit surprised that even Gemini Flash was not higher out of the box considering it gets access to both the video and the audio streams.14 Granted, the underlying Gemini model only gets access to every 1s frame that is sampled from the video - but even relaxing our 1s tolerance tightness does not meaningfully improve the scores. It cuts conservatively, which is reflected in the overall low number of predictions in the detected clip count column.
The results of transnetv2 also qualitatively look great. The cuts are sometimes a bit too liberal given my preferences, but in each cut I could clearly see the camera move enough where the "scene" delineation was ambiguous. The difference between a hard cut and a pan in these moments is really only clear with more context.
Clip Labeling
For the above reasons I ruled out using a cloud LLM for scene detection. But it's still very useful within this overall pipeline for labeling what the scenes are actually about. The ideal tags I'm looking for on each video include the date recorded, the location recorded, a text summary of the scene, and the people involved. My goal is to make it easier to search through our sea of content by person or memory.
You can write a prompt that includes these goals:
The following home videos can contain an arbitrary amount of people, but will often contain the following individuals:
- Pierce [included screenshot of baby me]
- Mom [included screenshot]
- Dad [included screenshot]
- Aunt J [included screenshot]
- Aunt M [included screenshot] ...
Describe what they're doing in each scene. If the narrator makes reference to what they're doing, include that in the description. Don't make anything up - always ground it in what's happening or what is being described.
This works where our previous pipeline failed for Gemini Pro, since we've already chunked out the scenes using transnetv2. The safety filter might overzealously block a few of these videos from being processed, but the majority of our clips should be able to get a labeling as output.
I was surprised by the ability of the models to generalize a single photo into a tag of people in the scenes. When I spot checked a handful of these videos, the results all checked out. I didn't rigorously test character recognition accuracy, but I suspect our performance here exceeds conventional facial recognition algorithms: the sources are too noisy for high quality matching plus the audio feed gives a huge advantage to the multimodal models. Often the person recording would call out people in frame by name.
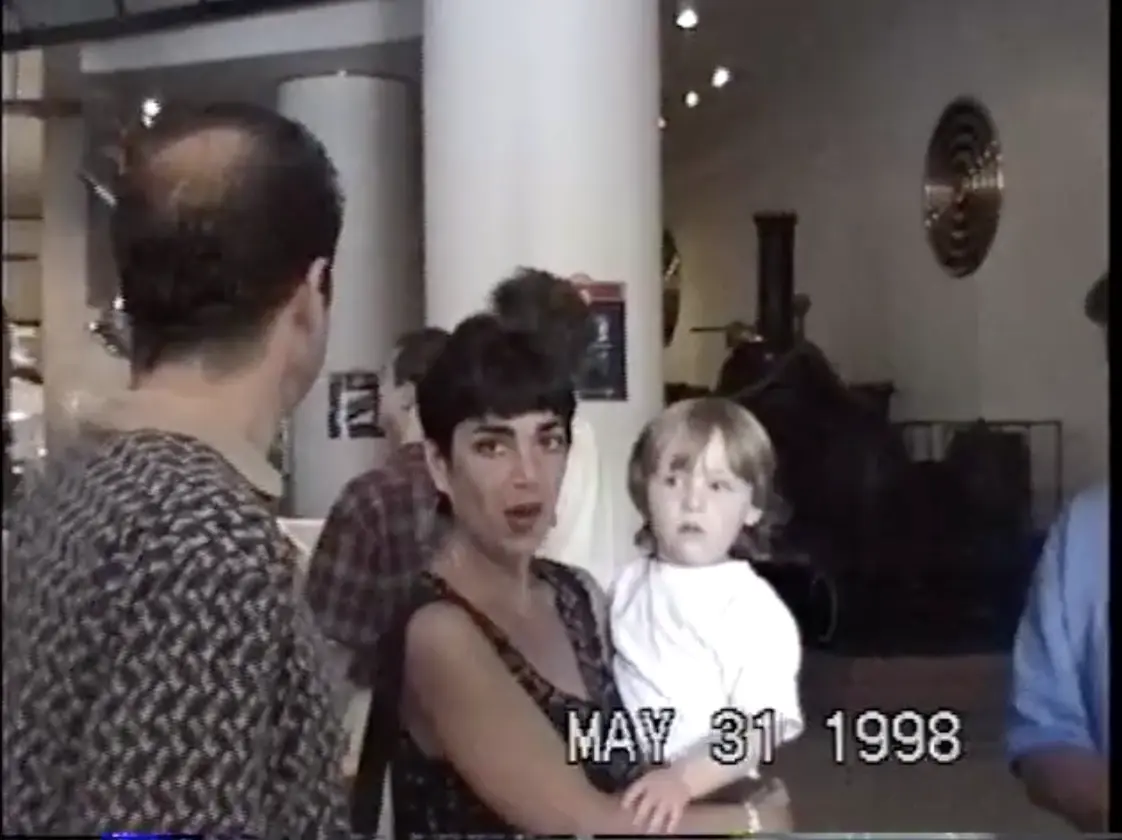
{
  "description": """
  Uncle S and Aunt M, holding Pierce, are at a museum,
  as stated by the narrator. A large airplane can
  be seen hanging from the ceiling.
  """,
  "known_date": "1998-05-31",
  "known_location": "museum"
}
When combined with the audio, even 1fps can give you a rich sense for what is happening in each scene. I'm particularly excited about the capability of this pipeline to provide more descriptive tagging. Just exactly how that can best be imported into Jellyfin is a project I'll leave for next week.
Replacement Cameras
Halfway through this project my miniDV camcorder broke. The tape tray on the DCR-HC32 always struck me as a bit too flimsy - it's a thin metal strip that aligns with very thin connection points - and it finally gave out on me.
I had a Canon Elura 100 accessible at the time, which could also read miniDV tapes and export them over firewire. But on importing a few of these I realized that the audio cut out aggressively every ~5s. It turns out this is pretty common with miniDV: the format has consistent video conventions but the audio can vary significantly across writers. The most common formats are 4-channel 12bit and 2-channel 16bit. Differences in the reader head and how it's aligned within the tape player can make those infeasible to read on another device:
- 12bit audio is recorded on the outer edges of the helical scan tracks versus 16-bit which uses the center
- It uses a different azimuth angle than the video tracks
- The audio head gap is narrower and requires tighter tolerances
And so, even slight misalignment causes the heads to miss portions of the audio track. Across brands and maybe even model versions it seems like you can forget about consistency. I bit the bullet and ordered another camera (DCR-HC96 to replace my DCR-HC32) in the Sony ecosystem for ~$125.
Why now
I'm sure it will always be possible to archive old analog formats. But already in the past 5 years I'm noticing it's become significantly harder to do so:
- macOS drops support for Firewire in Tahoe
- Apple stopped selling their Firewire to Thunderbolt2 connector; your only choice is to buy them on eBay for ~$150 - they retailed for under $50
- My camcorders still mostly worked but the touch screen on one had already failed; eventually the supply of working components for these is going to shrink
As the difficulty increases so does the cost. Eventually I imagine it will reach a point where it simply becomes economically unfeasible to try to go through these motions yourself. I was even lucky that I didn't upgrade my OS to Tahoe and I'm still on my Sequoia, so I don't have to find another computer just for the sake of importing these files.
At the same time, the quality of ML models to help process videos after the fact have never been better. They've reached a level of accuracy where they make small mistakes but they're right ~95% of the time. That's certainly above the bar we need for home categorization where we're looking for convenience and not perfect filtering.
The intersection of those two factors means that it's never been a better time to tackle that backlog of home videos. You can get the best quality out of your tapes and you'll actually be able to make them watchable.
If you start now I bet you can get done by the holidays.
Footnotes
-
Does she even know how much Ubiquiti gear that can buy us?? ↩
-
Any librarians can rest easy - I'm not going to. But for the sake of argument, we should feel comfortable if we did. ↩
-
Adhoc photos burned to disk, music from plays, etc. ↩
-
At least since people have collectively dumped the internal CD drives. ↩
-
I must admit, for a long time I just assumed they were more like old fashioned projectors where they would write the image directly on tape. ↩
-
It should really be called a YC-Video, right? ↩
-
They have to write the original recording, after all. ↩
-
This is a lot more difficult than error correcting digital bytes, because there are situations where you actually want to stop playing the tape, rewind, re-read the data. Doing that repeatedly can potentially uncover a lost value even if you didn't read it the first time. ↩
-
I wish more bash commands had a flag to let you get json output from the log stream. ↩
-
This isn't quite as smooth as the call from a native Swift app, since Javascript APIs can't even see the presence of the Continuity Camera until the iPhone is literally sitting on your desk horizontal. ↩
-
It's literally 1/2 the data - so you can stretch an hour long tape to two hours. ↩
-
O(1) is not the best evaluation dataset but this is a gut feeling, not a NeurIPS paper. ↩
-
Where yes - I would sometimes be wearing my birthday suit. ↩
-
Benchmarking an LLM in this way can be rather prompt dependent, so I would treat this as a baseline instead of an absolute measure. ↩
/dev/newsletter
Technical deep dives on machine learning research, engineering systems, and building scalable products. Published weekly.
Unsubscribe anytime. No spam, promise.