My simple home podcast studio
# September 22, 2025
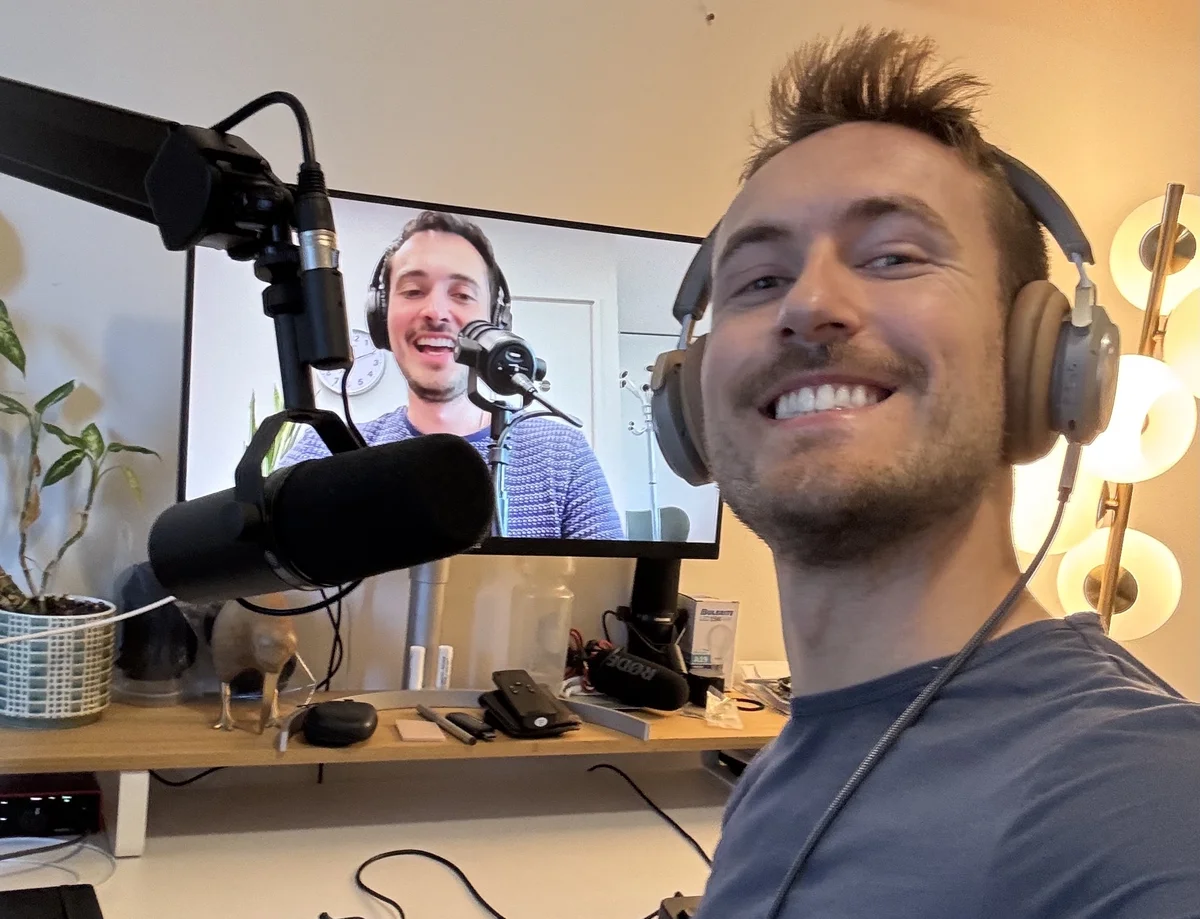
Richard and I have been recording Pretrained for the better part of four months now1. We're having a lot of fun but I wouldn't say we're good at it yet. The more we record the more than I am struck by the extreme talent of having a natural conversation, while recorded, intended for the consumption of other people instead of just yourselves.
The most popular podcasts (Lex, Joe Rogan, Call her Daddy, etc) are very sophisticated operations at this point. The hosts have the talent but they also have the infrastructure. We lack the infrastructure. You might argue we lack the talent as well. But there's no disputing we lacked the infrastructure.
So here are some rough notes on bootstrapping that from scratch.
Recording
At this point podcasting is an established medium. People have certain expectations for podcast quality. If the audio sounds like you're recording on a set of Airpods, they're going to tune out before they give you a chance.
And no matter how good your post production set up, you can't truly fix bad inputs. We were willing to invest upfront if it meant a better end product. We had three pretty simple criteria:
- Be able to do this in our apartments, without needing a sound studio
- Keep our initial investment under $1k for equipment
- Reuse as much of our existing gear as possible
Audio
While Richard's in London, we both have different recording setups. I have the Shure SM7B and he's rocking the Rode Podmic. The audio from both of them is great, honestly, which makes me think you really can't go wrong with any dynamic microphone over $100.
I always try to buy equipment used where possible; no need to pay the margins to drive consumer electronics off the lot. But for microphones, the unfortunate truth is the gray-market for duplicates of these microphones is raging.2 You can't easily ascertain the authenticity of these microphones while shopping eBay, and indeed I ended up ordering a fake Shure SM7B before I got wise to the whole scam. If you do order you're best off buying from an authorized reseller.
We record our audio online with Riverside. It's basically a lossless Facetime recording. It has low latency peer connection and records all audio/video feeds as separate tracks. If we have cross talk we can edit that out on a per feed basis.
This works well for our remote calls. It doesn't work well with in-person interviews, since our microphone-to-usb converter sends all microphones as the same Riverside track. This results in me and the guest sharing the same feed with all the cross talk that might get picked up. Not ideal. There's no reason in theory why Riverside has to work this way (they could allow multiple mic inputs from the same primary machine), but they don't, so we have to work around it.
Enter: Audio Hijack.
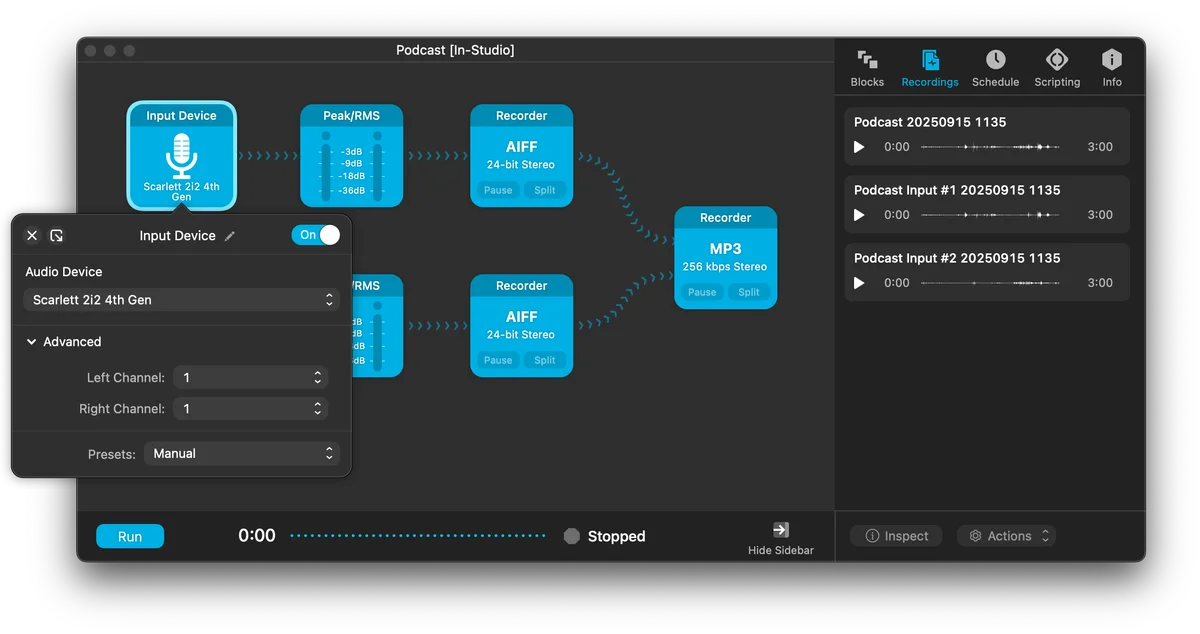
Our Audio Hijack workflow is pretty simple. Record separate tracks in lossless 24bit (higher quality than the default 16 bit). Our first input sets hardware channel 1 for both channels, which will only pick up the first mic. Our second input sets hardware channel 2 for both, which will only pick up the second mic.
Video
Okay - getting good quality audio is great. Some would argue that's actually all that we need. Podcasting is an audio medium after all, right?
I genuinely wish I could follow that advice. Alas you need to meet the market where it is. Distribution in the crowded world of audio only podcasts is quite difficult if not impossible. There are thousands of podcasts crowding the space, with an increasing number of AI generated shows every day. If you're going to play the game, you might as well play it on YouTube.3
Our audio setup has been the same since we started recording. We're making most of the tweaks on the video side. I would call our learning slope here aggressively steep. At least as evidenced by our video files below.
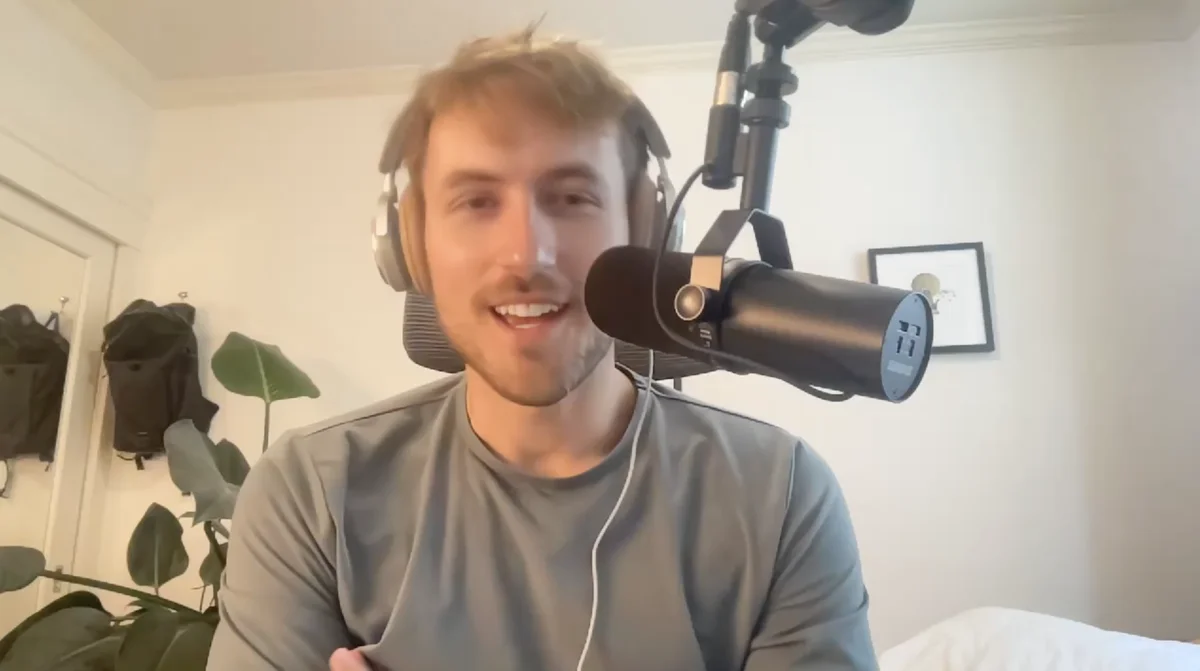
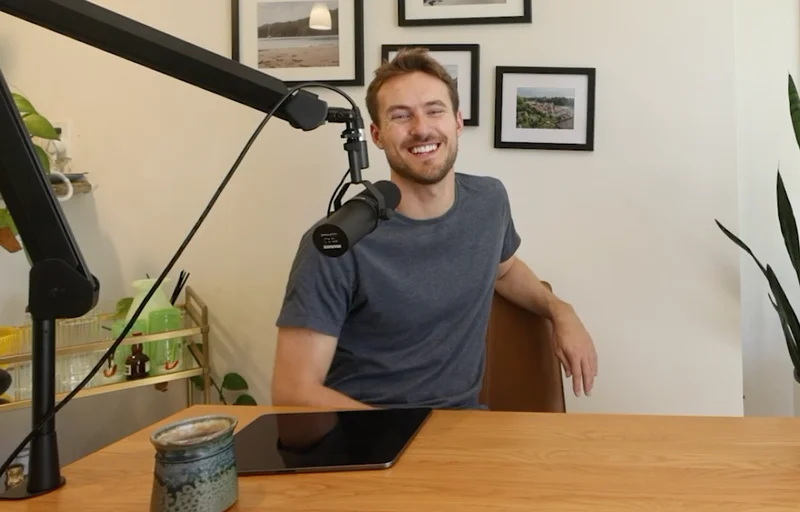
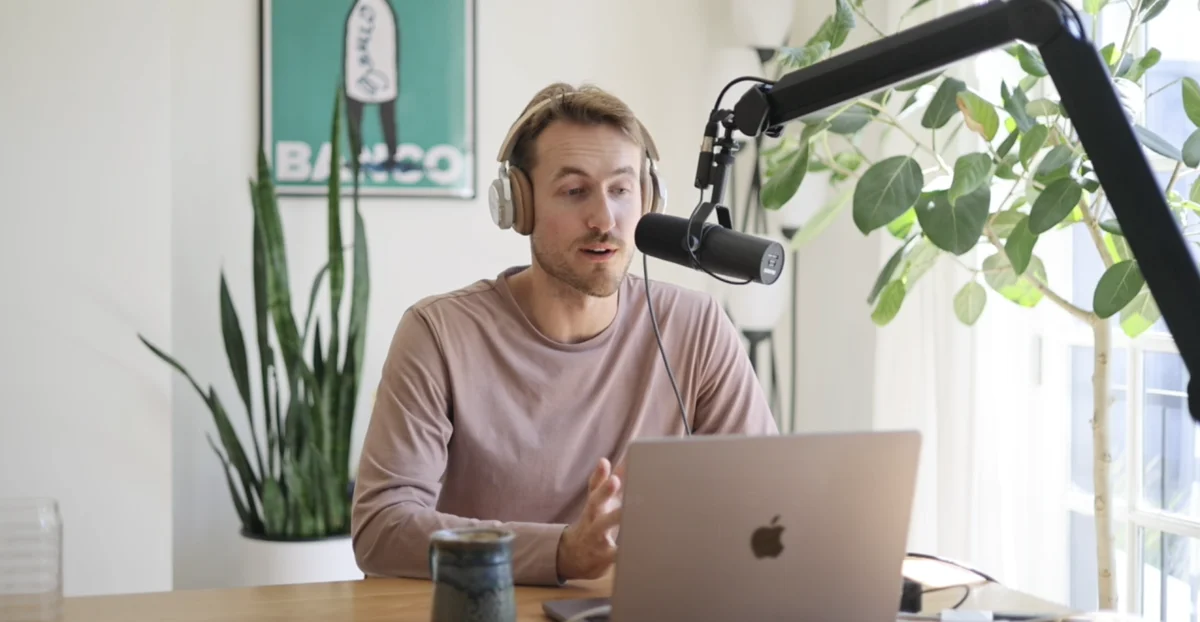
Ideally you really want N+1 different cameras in the recording room - one trained on the table and N for the different amount of guests that you have. That lets you do more proper cuts to allow focusing on each person as well as lets you more cleanly edit videos if you need to splice out a part of the speech.
For now that's out of budget. So I have a single stationary R5 mounted on a tripod that I originally got for all my travel photos. It thankfully doubles as a very good video camera. I originally though the 16mm wide lens was best suited for this kind of video work - and has the benefit of being able to capture multiple people in frame. But its depth of field is pretty lacking. The 50mm provides a much crisper look at the expense of having to be positioned that much further away from you. You can't tell it from the crop but the camera is probably a good 5-8 feet away from the table that I'm sitting at.
While the quality out of the R5 is fantastic for video, that's certainly not its main selling point. At least while recording at 4K, the body heats up aggressively when recording so you can only record continuously for ~30min. Our episodes last much longer than that, so we needed some way to offload the recording to an external destination.
I originally tried EOS Webcam Utility Pro, which is Canon's official app to use your DSLR as a webcam.4 Unfortunately USB-C can't drive live 4K, or at least the Canon implementation of it can't. Raw speeds of the protocol are certainly fast enough. So we're stuck with using the micro-HDMI port as the bridge to a capture card. I'm using the Elgato Cam Link 4K (requires USB-3 and a fast enough cable to communicate in realtime) - Amazon ships a basics cable that has support for the speeds we need coming out of the camera.
The pipeline:
R5 -> Micro HDMI to HDMI -> Cam Link 4K -> USB-3 to USB-C
Note that at least on the R5, you can't force your camera to output at 4K over HDMI. You instead have to set it to "Auto" HDMI output in the settings and have the protocol negotiate with the capture card. This should work if you have all the necessary equipment, but that means that subtle incompatibilities either in your cable or your recording card can drop you down to a lower resolution.
We then need to record the raw video somewhere. Riverside only has support for 1080p recording and we want to record in the full 4K to allow for crops. Quicktime seems to similarly cap our recording at 1080p; there might be a way to finagle OBS to do the full 4K resolution but I wasn't able to get quality up to par. ffmpeg was the most stable video recording I've found to actually deliver the full quality coming out of the camera.
# 1) Find indices of connected devices, look for Cam Link
ffmpeg -f avfoundation -list_devices true -i ""

# 2) Dump supported modes for the video device (assuming 0 is the link)
ffmpeg -f avfoundation -framerate 1 -video_device_index 0 -i "" -t 1 -f null -
Then the actual recording when we start an episode:
cd /Volumes/Recordings && ffmpeg \
 -f avfoundation -thread_queue_size 16384 \
 -framerate 30 -pixel_format uyvy422 -video_size 3840x2160 \
 -probesize 50M \
 -fflags +genpts \
 -i "Cam Link 4K" \
 -c:v prores_videotoolbox -profile:v 3 \
 -pix_fmt yuv422p10le \
 -r 30 -vsync cfr \
 -c:a pcm_s16le \
 -f mov -y output_4k_30cfr.mov
The Cam Link also supports a frame rate of 60fps and this seems to record fine on my Mac with hardware acceleration. Either way - at 30fps or 60fps - this pipeline generates files in the low terabytes for our recording sessions. My little 1TB laptop hard drive doesn't have nearly enough storage for that.
I do compression after the fact before we post on Frame:
ffmpeg -i output_4k_30cfr.mov -c:v hevc_videotoolbox -b:v 25M -tag:v hvc1 -c:a aac -b:a 256k output_4k_30cfr_converted_v2.mp4
Networking
For now I'm just recording in my living room. It has a big table, it's cozy, and it has some nice natural light.5 The wifi is fine for almost everything other than shuttling gigabyte files over the network in realtime.
I needed a physical cable to connect my laptop to my homelab. Since we don't have Cat wiring in our apartment, and I don't play it that fast and loose with our lease terms, I went the old fashioned way. Which means running a 50ft CAT cable from my router in the office, under the door, and into the living room.
It works like a charm: 10Gbps right from the living room table. Let me tell you I'm awfully tempted to keep it around when I'm just sitting on the couch.
Editing
We use Descript for the initial cut of the audio edits. Transcripts just feel like the right way to do a rough cut of podcasts; I just wish the software wasn't so laggy. We couldn't get video editing working well enough given our video sizes so we switched over to the Adobe suite. Premiere provided a lot more manual of an editing experience but could obviously handle our load.
There's probably a better way to get a multicam project set up but this is what's been working for me:
Sync Clips
Align the different guest recordings in the timeline. I'm doing this by waveform right now but Premiere seems to have auto alignment based on audio claps, if you have a proper amount of noise isolation in the clips themselves.
Nest the Aligned Clips
- Select all the aligned clips for the episode in the timeline.
- Right-click and choose Nest….
- Give the nest a name (e.g., “Podcast Multicam Source”).
Create a Multicam Source Sequence
- Right-click the nested sequence in the Project panel.
- Choose Multi-Camera → Enable.
Merges the video (and only the video together) so we can see.
Play and select cuts.
- Create a new timeline with the multicam nest.
- Go to the Program Monitor settings (wrench icon underneath the center playback view) → Multi-Camera.
Switch while playing by just clicking 1, 2, 3, etc on your keyboard.
Further Reading
YouTube and Reddit have become solid resources on the technical nuance of video production, even more than I was expecting.6
https://www.youtube.com/watch?v=LbQx7AAu6GQ
- ND Filter on camera to diffuse light out and change the aperture a bit
- Generally better to under-do lighting than over-do it
- Turn on the amibent light and light fixtures ("practicals") before trying to light the scene
- Recommended rig is one 300x (https://aputure.com/en-US/products/ls-300x) with a big diffuser (white blanket)
https://www.youtube.com/watch?v=fz56gDCjoao
- Always shoot into a corner / more depth in the frame
- "Motivated lighting" to look like primary light is coming from one source (perhaps the same side as the window that's already in frame)
https://www.youtube.com/watch?v=_DVUwlWsFCE
- Deep dive into Premiere NoiseGate
- Can help with automatically editing out some of the most obvious cross talk
Conclusion
I imagine we still have many more iterations of our pipeline to go. Just today we almost lost 30mins of recording when Riverside crashed and we thought we had corrupted the scratch files. It motivated us to double-record local recordings with Audio Hijack just like we do for in person recordings.
Tweaking on the margins is the name of the game. In some ways it's actually quite fun. It feels like dialing in your IDE when you first install it on a new box. What makes me the most trepidatious are the steps changes that are required when you step up some of this infrastructure. Want to go from 1 to 2 mics in person? No sweat? Want to go to 3? You need to upgrade from a $300 box to a $700 one. Plus now you need to figure out what to do with the old one.
But for now, this setup gets us 90% of the way there with 10% of the budget. And honestly, the constraints force us to focus on what actually matters: having interesting conversations worth recording in the first place. Talent before infrastructure?
-
We threw away our first 10 episodes when we realized this wasn't quite as easy as picking up the phone and shooting the shit. ↩
-
These aren't even "fell off the truck" duplicates where they're made in the same factory just sold under a different label. Their internal wiring is confirmed to be different but is hidden under a nearly identical packaging. ↩
-
Plus aren't moving pictures worth a million words? ↩
-
A bit funny to me that they have some internal team that's focused on writing Mac native software. ↩
-
This natural light doesn't make for the most controlled of filming conditions, but it makes you a whole lot happier than artificial light. I feel like that alone is worth the trade. ↩
-
It is a site based on videos, so maybe this shouldn't have been so surprising. ↩